Client portal guide
For travelers. Signing in with your access code, seeing your trips, and paying invoices.
On this page
Signing in#
Your travel advisor shares an access code with you: 8 characters. Type it in any case, with or without spaces or dashes between the characters. Enter it on the portal sign-in page (“View your trips”) and you’re in, with no username or password. You stay signed in for 30 days on that device.
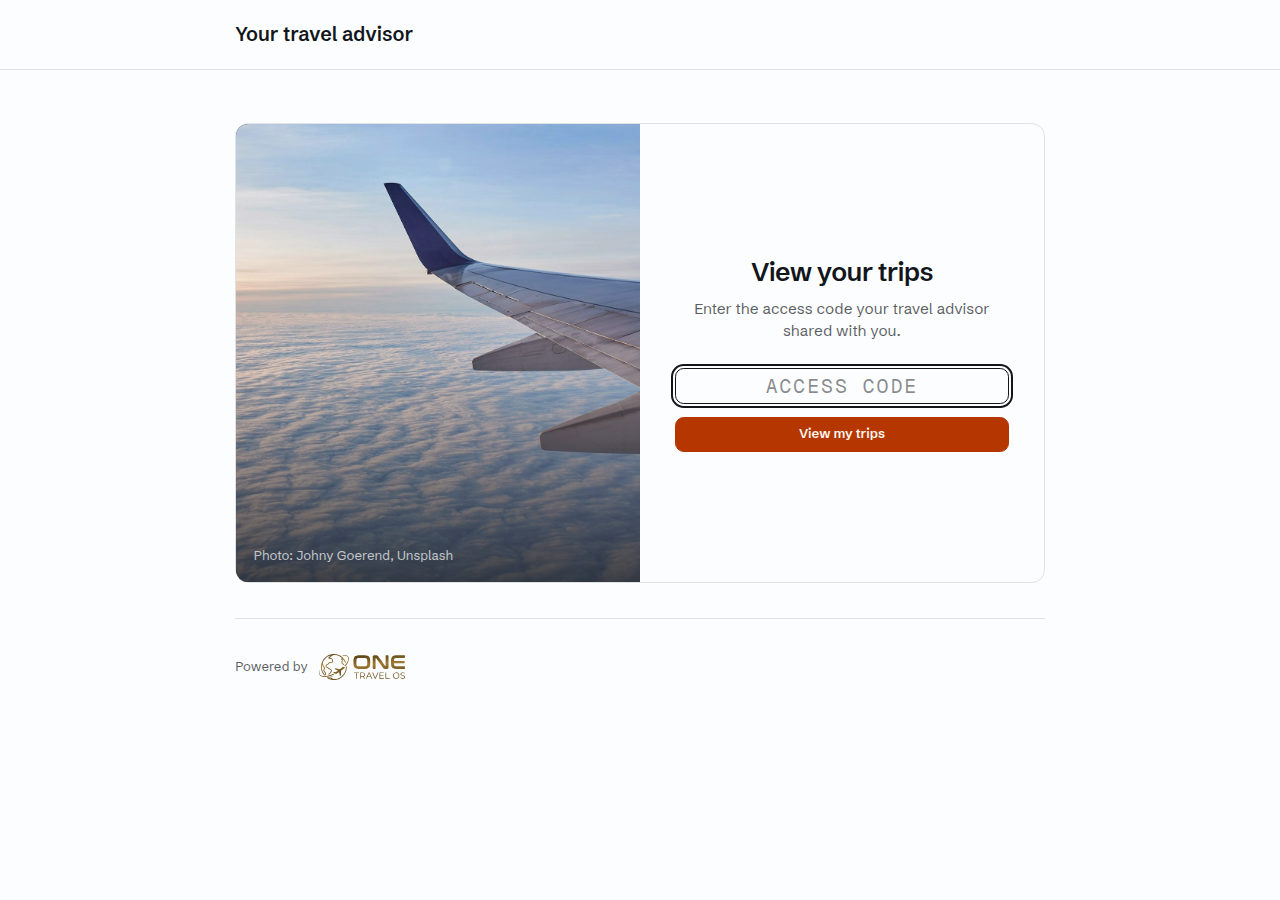
About the code:
- Keep it to yourself. Anyone holding it can see your household’s trips.
- Nobody can look it up, including your advisor and support. If it’s lost, your advisor issues a new one (usually by email), and the old code stops working the moment they do.
- A code that stops working has usually been replaced, since each re-send issues a new one. Check for a newer email, or ask your advisor.
Your trips#
The portal lists everything your advisor is working on for you. Each trip is a card under a photo of where you’re going, with its dates, how many days are left until it starts, and every reservation on it with its own dates. View trip details opens the trip, which shows the same photo, who’s traveling, a day-by-day itinerary, and your reservations: dates, confirmation numbers, deposit and final-payment due dates, what you’ve paid so far, and the balance. On the itinerary, a flight shows the seats your advisor has assigned to your own household’s travelers. An item your advisor set up for some of your travelers names them, such as “For Kenji Ito”.
In the week before a flight, the itinerary also shows the flight’s latest status under it, such as Delayed 45 min with the new departure time, the terminal and gate, and when it was last updated. If a flight is cancelled, delayed by 30 minutes or more, diverted, or moves to another gate, you also get an email about it. The airline’s app and the screens at the airport have the final word.
The flights, stays and sailings themselves are in the day-by-day itinerary, each with its own Ref. A reservation card links to them (“2 flights in Day by day”) instead of listing them again, and leaves off its confirmation number when its lines already show it.
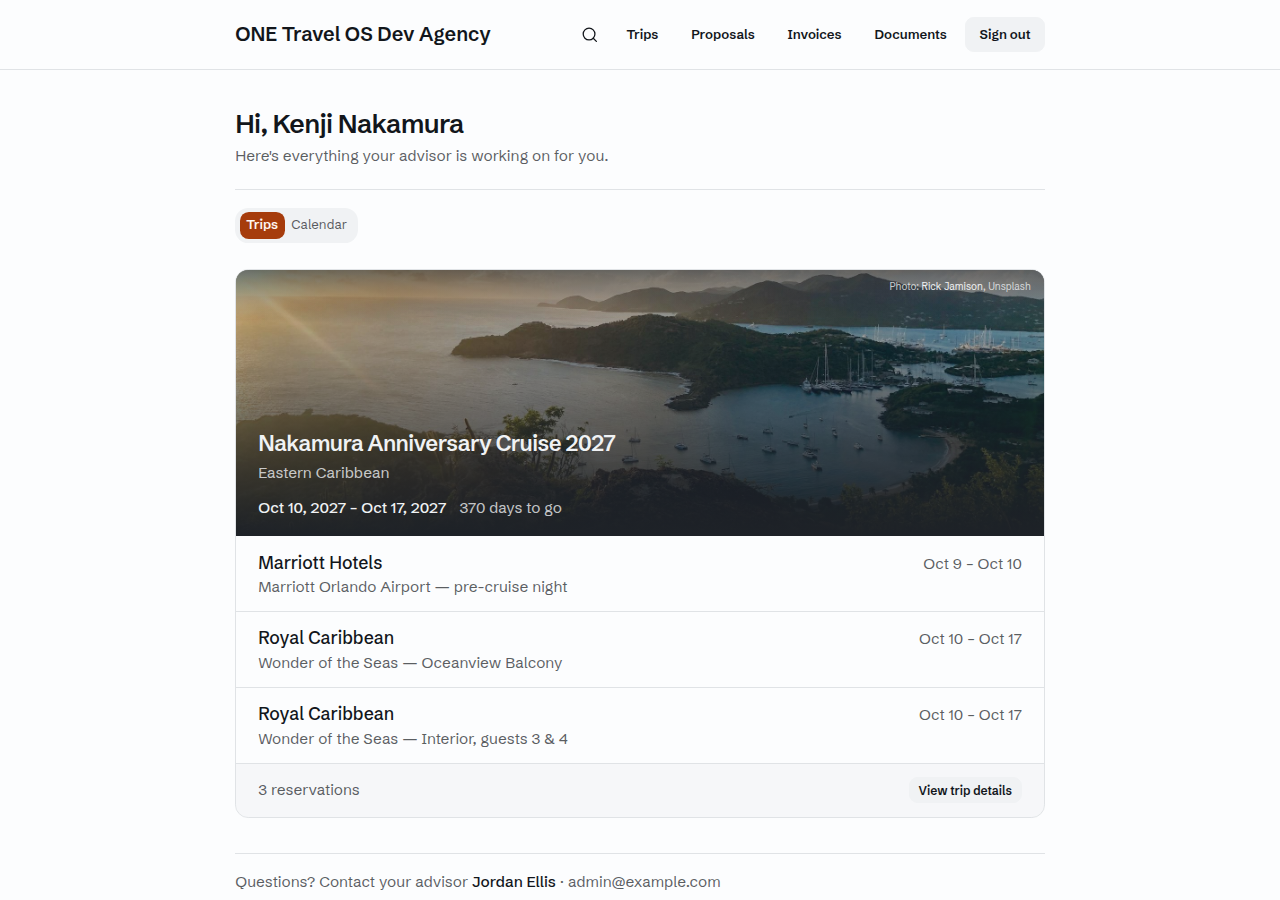
Calendar, beside Trips at the top, shows the same trips on a month calendar, each as a bar across the days it covers. ‹ and › step a month, and the colors say whether a trip is coming up, under way, or over. On a phone the month is a list instead.
On the trip itself, Timeline under the day-by-day itinerary shows your reservations and itinerary on a scale of days or hours.
You see prices, payments and dates; the agency’s internal notes and records stay out of the portal.
If your advisor has pinned any of your itinerary stops to a real place, a map appears under the day-by-day list with those stops numbered in order. Select a pin to see the stop, where it is, and its time. Stops your advisor typed by hand are still on the itinerary but not on the map. A trip with no pinned stops shows no map, and a few weeks after a trip ends its map goes away while the day-by-day list stays.
Pinned stops also show a photo of the place, credited to whoever contributed it and to Google Maps, and an Open in Google Maps link that opens the place in a new tab, with its address, phone number, opening hours and directions.
Your advisor can also add their own photos to a stop, such as the hotel or the boat. They show as small pictures under the stop. Select one to see it full size.
Adding your own plans#
Add the dinner, tour or show you booked yourselves, and it sits on the trip beside everything your advisor planned. On the trip, Your own plans is under the day-by-day itinerary. Click Add a plan and fill in Name, Type and Day, plus a Time, Confirmation number, Where and Notes if you have them. Add plan puts it in the day-by-day itinerary on that day, marked “Added by you”.
Your household and your advisor see your plans. On a trip you share with another household, they don’t see yours and you don’t see theirs.
A plan isn’t a booking: it has no price, and there’s nothing to pay for it here. Leave card numbers out. The portal refuses any it finds.
Each plan in Your own plans has Edit, Hide and Remove. Hide takes it out of the day-by-day itinerary and the timeline, and keeps it in your list marked Not in Day by day. Show puts it back. You can change only the plans you added. If your advisor hides one of yours, it stays in your list the same way, and you can show it again.
Your packing list#
On each trip, Packing list shows what to bring: a For everyone section and one for each of your own travelers. Tap an item when it’s packed, anywhere on its row, and tap it again to unmark it. Your advisor sees the tick, and you see theirs, within a few seconds.
Add item under the list opens the form: Item, How many, Kind, Note (optional) and For. After Add, the form stays open for the next item; Close puts it away. The ⋯ at the end of an item’s row holds Edit, which opens the item across its whole row, and Remove. You can remove the items you added; the ones your advisor added stay until they remove them.
On a trip you share with another household, you see only your own travelers’ items and the shared ones, never theirs, and they never see yours.
Trips you’re a guest on#
Sometimes you travel on someone else’s trip: a relative’s or a friend’s household booked it, and you’re along. Those trips appear in your list too, marked “guest of …”, and the trip page says so at the top: “You’re traveling on …’s trip.”
On a guest trip you see the plans: dates, destination, everyone traveling, the itinerary items for everyone and for your own travelers, and the supplier, dates and confirmation number of each reservation for everyone or for your own travelers. You won’t see what that household paid, what they still owe, or their payment dates, just as they can’t see yours. Items and reservations your advisor set up only for the other household’s people stay on their page, and the ones only for yours stay on your page.
If you’re paying for your own part of the trip (your own room at a wedding, say), your advisor records those reservations as yours. Each one then shows your deposit and final-payment dates, what you’ve paid, and your balance, as on a trip of your own. The note at the top says so: “the payments on your own reservations are below”. The household that booked the trip sees those reservations as travel only, with “Payments on this reservation are handled by another household on the trip.” and no amounts.
You can also write to the trip’s advisor about your part of it; see Messaging your advisor about a trip.
Messaging your advisor about a trip#
Every trip your household booked, and every trip you’re a guest on, has a Messages section under the reservations. Type in Your message and press Send. It goes straight to the advisor named on the trip, who is notified the moment it arrives. Their reply appears in the same place, and you get a copy by email.
How it works:
- It’s your household’s own thread. Everyone who signs in with your access code can read and write in it, so each message is labeled with the household’s name instead of “you”.
- On a trip you’re a guest on, your thread is separate from theirs. The household that booked the trip has its own thread with the advisor. Neither of you can see the other’s, or tell whether it exists. If a different advisor looks after your household than the one running the trip, the trip has no Messages section; contact your own advisor instead.
- Text only. You can’t attach files here. If your advisor needs a document, such as a confirmation, use the forwarding address shown on the trip page. Your advisor can attach images and PDFs to their replies, and you’ll see them in the thread.
- Never put card details in a message. A message containing a card number is refused and nothing is kept; the text stays in the box so you can edit it. If your advisor needs a card, they’ll arrange it with you directly.
- Replying to the email works too, but it reaches your advisor’s mailbox instead of this thread, so the conversation continues by email from there.
- Messages are up to 5,000 characters, and the page tells you how many are left as you get close.
If your agency archives a trip, it leaves your portal along with its messages; ask your advisor if you need something from an old conversation. The same happens to a trip you were a guest on once nobody from your household is on it any more.
Proposals, and choosing one#
Proposals lists what your advisor has put together for you: one or more priced options for a trip, side by side, each showing what is in it.
Choosing an option records your choice and emails you the option you picked to sign. It is not accepted until you have signed it, so if you change your mind before signing, tell your advisor and nothing has been agreed. Until you sign, you’ll see Sign now on the proposal. It opens the signing page.
If you’re signed in to the portal on the device you sign on, the page after signing takes you to the next agreement waiting for you, such as an insurance waiver after a trip agreement. It keeps going until you’ve signed them all.
Prices are quoted by your agency and are not held until booked; supplier terms, deposits and cancellation conditions apply.
A proposal marked as replaced means your advisor has sent you a newer version. The old one stays readable so a link you were sent still works.
Invoices and paying#
Invoices lists planning fees from your agency. These are fees for your advisor’s professional services, separate from any payment you make to a travel supplier for the trip itself. Trip payments to suppliers aren’t shown or collected here.
Each invoice links to its own payment page, which is also linked from the email the invoice arrived in. If card payment is available, the button takes you to the card processor’s own secure page: card details are never entered on, or stored by, the agency’s site. After you pay, the page confirms within a minute or so.
Tickets and other trip documents#
Your advisor can put the files you need for a trip on the trip page: e-tickets, hotel confirmations, transfer vouchers, a cruise line’s boarding documents. They are listed in the trip’s Documents section, newest first, with the date each was shared. Click one to download it.
- Only what your advisor has shared appears. A file they are still checking isn’t listed yet.
- On a group trip you see your own files and the group’s. Only you can open files for your household alone, like your tickets or your room voucher. A file marked For everyone on the trip is open to every household traveling, and is usually the schedule or the transfer times. You won’t see another household’s own files.
- These stay until your advisor removes them. Unlike identity documents, they are not deleted on a schedule, so your tickets are still there on the day you travel.
- Confirmations you forward yourself appear here too, marked with the day you sent them. They appear once they have been read, and only if they came from the email address your agency has for you.
Waiting for a trip. A confirmation you sent to your own forwarding address, instead of a trip’s, isn’t on a trip yet. Neither is one your advisor has taken off a trip. Until your advisor files it on the right trip, it is listed under Waiting for a trip on the Documents page, where you can still open it.
Your signed documents#
You can reopen anything you have signed with your agency from the portal, without requesting it.
- Documents opens on Signed agreements. It lists everything you have
signed, with the trip each one belongs to and the date you signed it:
- your household agreement, which covers all your trips
- trip agreements
- proposals you accepted
- the insurance waiver you signed if you declined travel insurance
- Each trip page has a Documents section listing that trip’s documents. The household agreement belongs to no single trip, so it appears only on the Documents page.
- Click a document’s name to download it. Each click gets a fresh download link that stops working after five minutes, so a copied link won’t reach your agreement for long; the page always gives you a new one.
- Something still waiting for your signature isn’t listed. It appears here once it is signed.
On a trip you’re a guest on, the paperwork stays with the organizer. The trip agreement, the proposal and the insurance decision belong to the household hosting the trip, so a guest’s trip page doesn’t list them.
Updating your travelers’ details#
Documents lists everyone on your account, each with a word about their details:
- Details complete: date of birth and passport details are on file.
- Missing details: something an airline or cruise line will ask for isn’t.
- Passport expires month year, or Passport expired: the passport runs out within six months, or already has.
Select Update details beside a name to correct that person’s names, date of birth, passport and Known Traveler Number, contact details, travel preferences and emergency contact. Press Save details and your advisor sees the changes straight away.
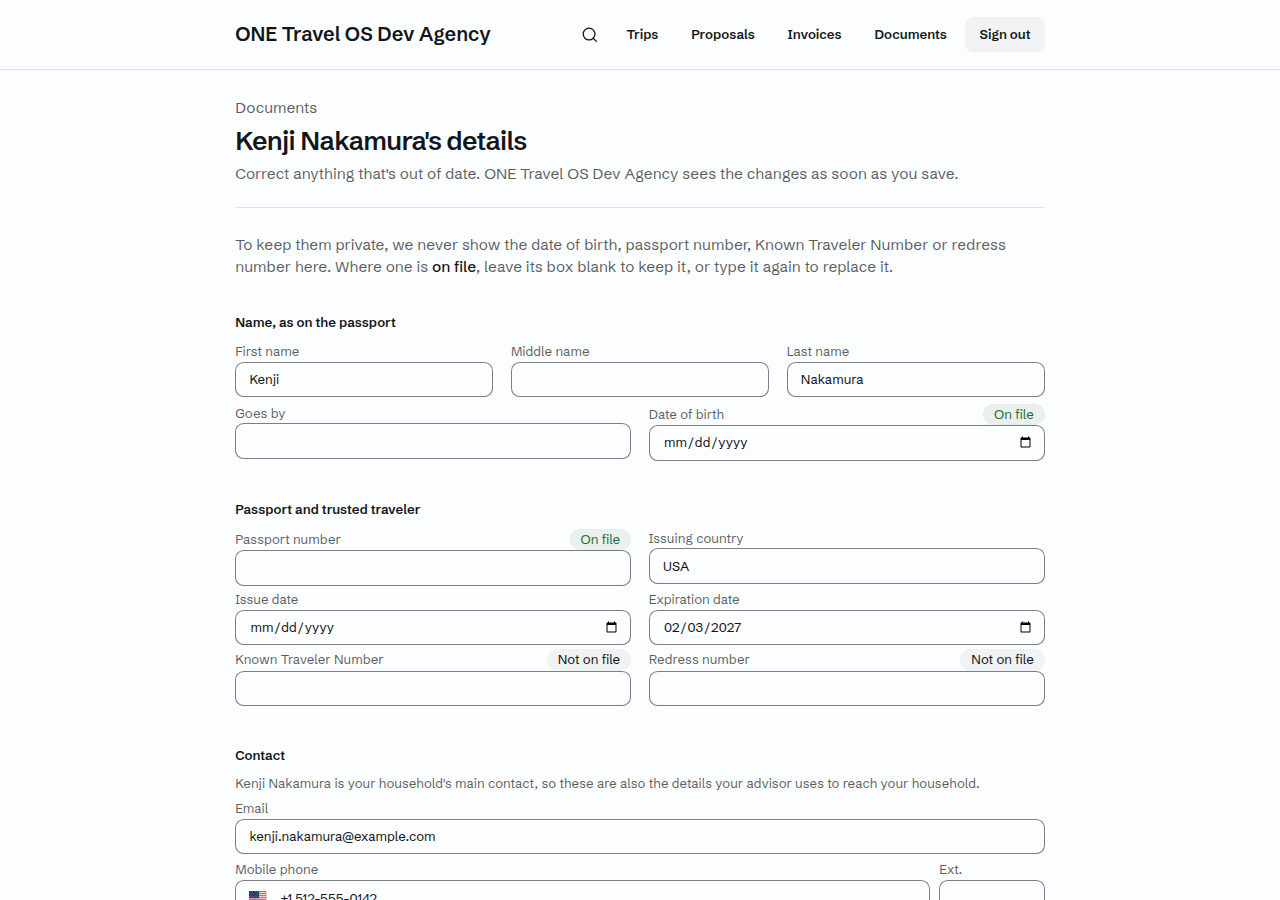
- Some details are never shown back, to keep them private: date of birth, passport number, Known Traveler Number and redress number. Each has an empty box marked On file or Not on file. Leave it blank to keep what’s on file; type it again only to replace it.
- Contact details belong to the person who holds them. If someone shares another traveler’s email, phone or address, the page says whose instead of showing a box. Your household’s main contact’s email, phone and address are also where your advisor reaches your household.
- Changing a phone number withdraws any agreement to get text updates at it. The page says so beside the box. You can agree again under Text message updates.
- Never type a card number into a preference or the emergency contact. It’s refused and nothing is saved.
If something looks like a typo, you’re asked before anything is saved: an expiration date before the issue date, an expiration more than ten years away, a date of birth in the future or more than 120 years ago, or a change to a name, date of birth or passport detail for someone whose travel is already booked. Choose Yes, that’s correct to save it as typed, or Let me fix it to go back to the box. For travel that’s already booked, the airline, cruise line or hotel may already have the old details, and changing them here doesn’t change them there, so your advisor is told and checks the booking.
If your advisor emailed you a link
Your advisor can also email a link to update your details, one for each person, with no access code needed. The household’s email lists one link per traveler, and you can forward each link to the person it names; it opens only that person’s details. If a link was sent to you alone, keep it to yourself.
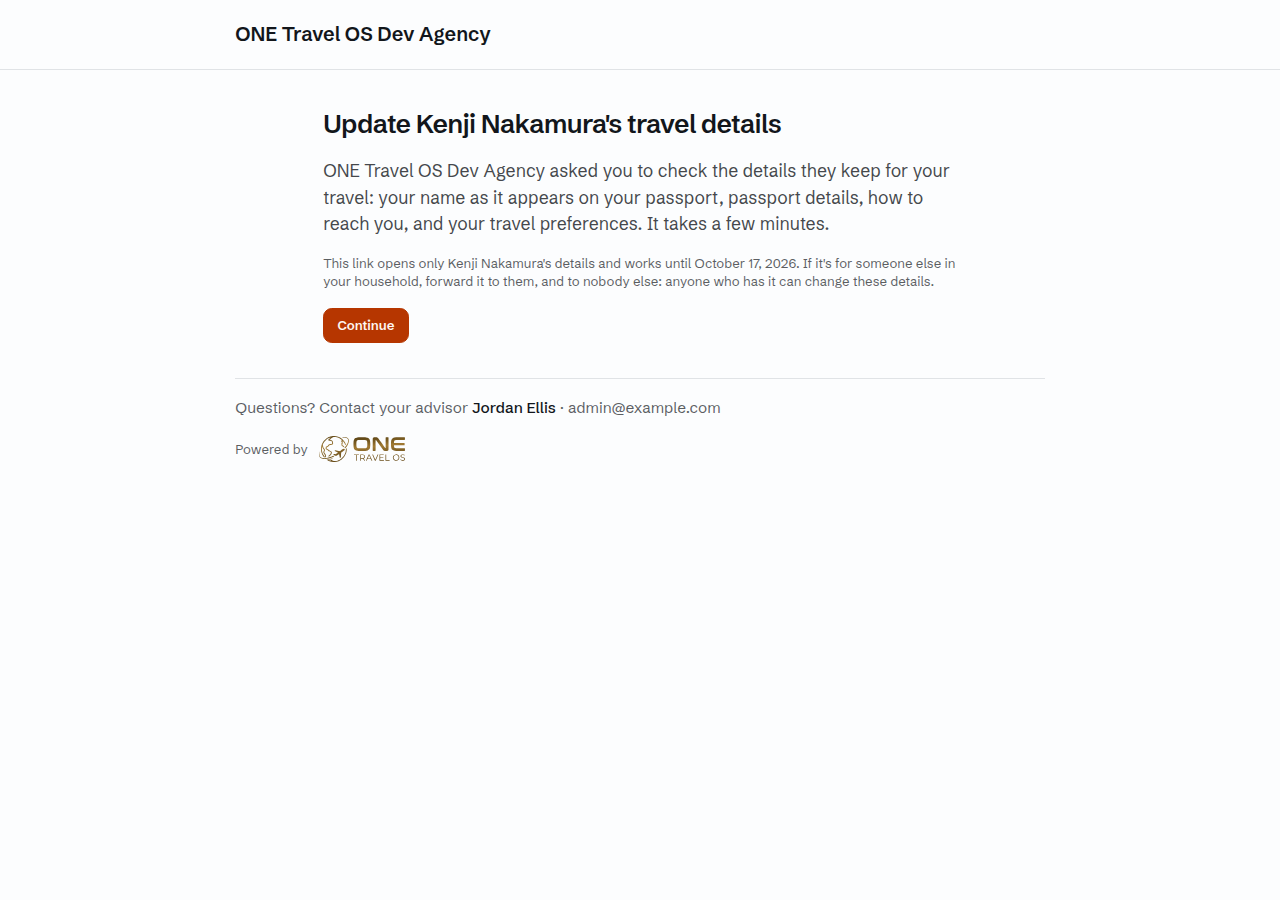
- The first time you open a link, press Continue. After that it opens straight to the form.
- It’s the same form as above, with the same warnings and the same private details never shown back. When you save, the page says Thanks. Name’s details are saved.
- If you haven’t used a link after three days, you’ll get one reminder email with a fresh link. The link in the first email still works too.
- A link works for 14 days and you can use it again to correct a mistake. If your advisor sends a newer one, the older link stops working. A link that no longer works says This link is no longer active: ask your advisor for a new one.
Sending your travel documents#
The Identity documents part of Documents lets you hand your advisor a passport scan or a visa without putting it in an email. It lists everyone on your account, each with their own upload button: pick the file under the name it belongs to, and it lands on the right person.
- Photos or PDFs, up to 10 MB each and 10 files per person. A phone photo of the passport page is fine.
- Uploads add to what’s already there. You can open anything you’ve sent by clicking its name, but you can’t delete it from this page. If you send the wrong file, tell your advisor.
- Your advisor can see anything you upload as soon as you send it.
- Never upload a card. If a file’s text holds a card number, ONE Travel OS refuses it and tells you why. That check reads the words inside a document, and it cannot read a photograph. A picture of a card would upload like any other photo, and you can’t delete it from this page afterwards. If your advisor needs a card, they’ll arrange it with you directly.
These documents don’t stay forever. Once your travel is finished and your agency’s retention period has passed, identity documents are deleted automatically, because an old passport scan left in a system is a risk to you.
Filling in passport details from a scan
If your agency has switched it on, each photo or PDF you’ve uploaded has a Fill in passport details from this scan button beside it. If you don’t see it, there’s nothing to do: your advisor types the details in, as always.
It’s optional. Pressing it sends that scan to an outside service to be read, and the line under your files tells you so before you press anything. Then:
- Wait a few seconds while the scan is read. The page updates itself.
- Check what was read. You’ll see the passport number, issuing country,
date of birth, issue date and expiry date, each with a word beside it:
- Checked: it matches the two lines of letters and numbers at the bottom of the photo page, which carry their own check digits.
- Didn’t match: it’s left blank instead of filled in with something that may be wrong, and your advisor enters it.
- Not checked: nothing on the passport can confirm it (the issue date and the issuing country), or those bottom lines couldn’t be read. Look at it twice. Untick anything that’s wrong. You can’t change names from here.
- Save passport details saves only what’s ticked, and your advisor is asked to check it against the scan.
After that the page says Passport details saved and the date, and never shows the details again. If you press Not now or close the page, nothing is saved, and your advisor checks what was read and finishes it. What was read stays on this page for an hour, then only your advisor sees it. Each person can be read three times a day. If a photo won’t read, upload a clearer one of the photo page, or leave it to your advisor. If a payment card number shows up in the photo (a card lying beside the passport, say), that photo is removed from your documents and nothing from it is saved, because a document with a card number in it isn’t kept. Your advisor is told. Upload a photo of the passport page on its own. If the page says reading passports from a scan is paused for now, your photo is fine and that try didn’t count: try again later, or leave it to your advisor.
Text message updates#
Under Text message updates you can ask your agency to text you when something on your trip needs you: a signature request, a deadline in the next day, or an overdue invoice. Nothing else, and never marketing.
It is entirely optional. Nothing about your trips, your invoices or your portal changes if you say no, and consent is not a condition of anything you have booked.
Setting it up takes two steps, and you take both:
- Enter your mobile number and tick the box. The box is never ticked for you. The wording above it is the whole agreement (who is sending, what they will send, and how to stop), so read it.
- Type back the six-digit code we text to that number. The code proves the phone is yours, so one mistyped digit can’t sign a stranger up for your trip deadlines.
Nothing is texted to you until both steps are done. If you tick the box and never enter the code, the page says so and no messages are sent.
The code lasts ten minutes. You can ask for a new one after a minute, a few times a day; each one is a real text message, hence the limit.
Stopping
Three ways, all equivalent: turn it off on this page, reply STOP to any message, or ask your advisor to change or remove your number.
Stopping these does not stop your travel advisor writing to you. They are the agency’s automated updates. If your advisor texts you directly about your trip, that conversation carries on either way.
If you change your number, both steps start again: the agreement and the code are tied to the exact number you confirmed, so nothing follows you to a new phone until you confirm it too.
Notices at the top of the portal#
Now and then a notice appears across the top of the portal, under your agency’s name. It comes from ONE Travel OS, the service your agency uses to run the portal, about the portal itself: planned maintenance, for example, or a problem being fixed.
The × beside a notice puts it away for your household. A red notice marked Important has no × and stays until the problem is over. Notices only ever appear here: ONE Travel OS doesn’t email or text you about them.
Questions about anything you see? Your advisor’s name and email are in the portal’s footer; contact them directly.